Showing posts with label halloween. Show all posts

3 Ingredient Chocolate Chip Pumpkin Cookies


      My friend hosted a Pinterest party.  For the party, everyone is suppose to make and bring a food item they found on Pinterest to share with everyone else.  I looked on my Halloween Pinterest board and I didn't find anything that I really wanted to make or had time for.  I remembered one of my favorite fall cookies and decided to make them instead.  I love these chocolate chip pumpkin cookies for many reasons.  

(1.) They are so simple 
(2.) They only take 3 ingredients 
(3.) They are the perfect Fall and Halloween treat
(4.)They taste delicious
(5.) They are so moist
I started these cookies an hour before the party and they were done before I had to leave!  


Ingredients:

15 oz. can of pumpkin puree
1 spice cake mix
1-2 cups semi-sweet chocolate chips (depends how much chocolate you like in your cookies)

Directions:

1. Preheat oven to 350 degrees.
2. Mix pumpkin puree and spice cake mix together.  Stir in chocolate chips.
3. Place spoonful of dough on  greased baking sheets. 
4. Bake for 8-10 minutes.
5. Remove from oven and let cool.

Simple as that!

10 cost effective Halloween Ideas

I love celebrating Halloween with creative costumes, fun decor, and tasty treats.  Here are 10 things that I have done to get in the Halloween spirit.


Cat in the Hat Costume


Superman Costume


Halloween Frame


Mummy Cans


Halloween Chocolate Bar Covers


Candy Corn Sugar Cookies


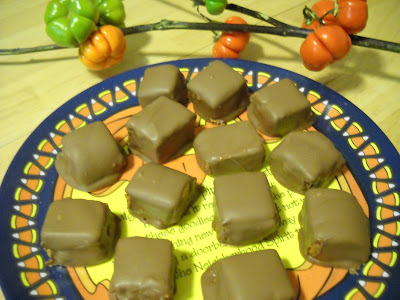
Candy Corn Butterfingers


Candy Corn Fruit Treat


Mummified Pizzas


Bone Breadsticks


Halloween Chocolate Bar Covers


I love Halloween.  When I think of Halloween I think of  pumpkins, hay rides, apple cider, candy, and cute kids dressed up in costumes.  I don't like the scary aspect of Halloween.  There are so many fun and simple treats and crafts you can make for Halloween.
This is one craft that is so simple that you can make to give to your children, school teachers, friends, and trick-or-treaters.  I made these crafts at a pinterest party, but the idea came from Women's Day.


You can even make a vampire

Happy Halloween!

My little Superman


Before our son was even born I often wondered how we should have him dress up on Halloween.  I wanted to wait until after he was born so we could see him and pick a costume based off of his personality.  Since the time we brought Rylan home from the hospital he stretches all the time.  He has the cutest stretches.  One of his stretches reminds me of Superman.  Thus, we came up with the perfect costume for our little Rylan.
SUPERMAN!  It only cost me 1 dollar!!! I already had the clothing items and felt at my house.  I just had to buy material for the cape.  Now that's my kind of costume. I am sure this will be the cheapest costume this little one will have!

 I made the "S" out of felt.  I cut the red out in one piece and then cut the sections of the yellow.  I then sewed the yellow pieces onto the red felt by hand.  I attached the "S" onto the onesie with zots (sticky dots). This way we could take the "S" off once we were done.

To make the belt, I just cut a strip and a circle. I sewed the circle onto the strip of felt and added a piece of velcro.  I only used the side of the velcro that does the sticky, since it sticks to the felt on its own!  To make the cape I free-handed the pattern.  I sewed to pieces together and turned it inside out.  I attached the cape on with safety pins.  


Isn't he one cute (and sleepy) superman!


Fall Pinterest Party

I went to a Fall Pinterest party at my friend Stacie Skinner-Hoxie's house.  For those who have never been to a Pinterest party, you are missing out!  Everyone brings a food item that they made from Pinterest and a craft for everyone to make.  You can also bring things to show off that you have made too.
We had a great time chatting, eating, and crafting it up. Here are a few things we made and did.


Chocolate bats and ghosts 


Candy Corn Fruit Treat
Layer fresh pineapple, mandarin oranges, and top with whipping cream.
A lot of Halloween treats are so sugary. This is a nice change up.


Sticky Note Clipboard
Materials:
* coaster
* mod podge
* paper
* sticky notes
* paper clamp
* cute tape (I am not sure what you call the stuff)
* flower (optional)
* hot glue gun

Clipboard
* Use a coaster from a restaurant or you can buy them at a craft store.
* Trace paper around the coaster.
* Mod podge paper onto coaster
* Mod podge on top of paper
* Let dry
*Stick sticky notes on top of coaster

Clamp
*Put tape on paper clamp
* Put the clamp on the board/sticky note
* Hot glue a flower on top


Gardner Village Stroller Walk


Garrett came home from school and needed a study break.  Rylan and I wanted to get out of the house.  So we headed to Gardner Village to rake a stroll and look at all their crazy witches.


Love him!

Cat in the Hat


At the school where I work, we have a Halloween parade.  That means I have to figure out what to dress up as every year.  The tricky part is coming up with a costume that the kids will know who or what I am.  I hate spending money on costumes that I will just wear once.  This costume cost me a whole $2.50!  It was a huge hit.  The best part was wearing it during the evening while trick-or-treaters came to our home.  Their reactions and comments were priceless.  I think they enjoyed seeing the costume more than getting the candy.  


Gloves from Michaels: $1.00 

 Hat: I already had the hat

Felt: $1.50
Bow: I cut felt and then hot glued the bow together.

Shirt: I already had a black long sleeve shirt and an old white shirt.
I just cut out my old white shirt and sewed it onto the black shirt. 


Tail: I just rolled up a piece of felt and the sewed it together.

Black Pants and shoes: Already had


Mummies


My friend, Stacie, had a Pinterest party.  We were suppose to bring a craft and/or a treat that we found on pinterest (relating to Halloween).  It was hard trying to figure out a craft I could bring that lots of people could make.  I found this idea on Pinterest and so we made them at the party.  


Materials: 
* Googley eyes
* Glue
* Cheese cloth
* Emptied and cleaned food can


Steps:
1.) Glue the eyes on the can
2. ) Cut strips of cheese cloth
3.) Wrap the cheese cloth around the jar
4.) Wrap some more
5.) Wrap until every spot of the can is covered.
6.) Fill with goodies

It can't get much easier!


The Cat in the Hat

Happy Halloween From the Cat in the Hat!

Every year I wait until the night before to decide what I will dress up as for Halloween.  This year I decided what I would dress up as an entire week before Halloween :)  It was nice to have a little bit of planning time.  I wanted to be someone that all of the kids could relate to and know who I was... The Cat in the Hat.


 Gloves
 Hat
 I cut an old white shirt and stitched it on a black long sleeve shirt. 
 I made the bow with felt, scissors, and a hot glue gun. 
 I made the tail by rolling up a piece of felt.